Best Blink Security Cameras of 2025: Features, Benefits, and Buyers’ Guide
Why Blink Cameras Are the Perfect Choice for Reliable Home Surveillance Keeping your home safe has never been easier, thanks to Blink’s cutting-edge security cameras. Whether you’re monitoring your outdoor spaces, enhancing indoor surveillance, or securing dark areas with extra illumination, Blink offers a solution for every need. In this article, we explore three of…
Why Blink Cameras Are the Perfect Choice for Reliable Home Surveillance
Keeping your home safe has never been easier, thanks to Blink’s cutting-edge security cameras. Whether you’re monitoring your outdoor spaces, enhancing indoor surveillance, or securing dark areas with extra illumination, Blink offers a solution for every need. In this article, we explore three of their top models: the Blink Outdoor 4 3-Camera System, the Blink Mini Pan-Tilt Camera, and the Blink Outdoor 4 Floodlight Camera. Each product is designed to provide maximum security with user-friendly features, making them excellent choices for homeowners and renters alike.
Blink Outdoor 4 Security Camera System
Key Features
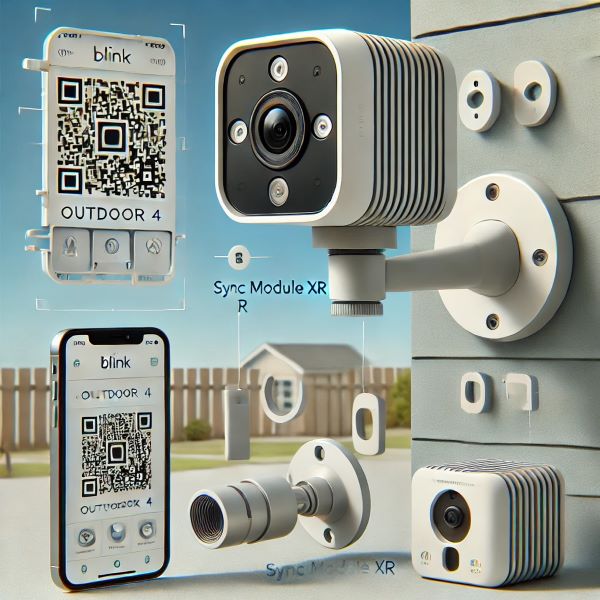
The Blink Outdoor 4 is a wireless 3-camera system designed to handle both indoor and outdoor security needs. Equipped with a robust two-year battery life, these cameras ensure uninterrupted monitoring without frequent maintenance.
The dual-zone motion detection technology helps distinguish between significant movements and false alarms, reducing unnecessary notifications. With HD video, you can enjoy crisp live views and recordings, perfect for keeping an eye on your property.
Who’s It For?
This system is ideal for homeowners with larger properties or those looking for comprehensive outdoor coverage. The 3-camera setup is great for monitoring driveways, backyards, and other key outdoor areas, while its wireless nature makes it suitable for renters who want an easy-to-install solution.
Blink Mini Pan-Tilt Camera
Key Features
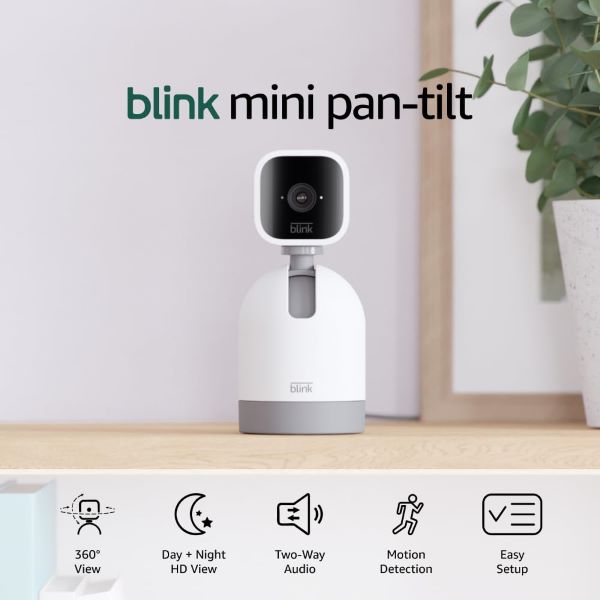
The Blink Mini Pan-Tilt Camera is a compact yet powerful indoor surveillance tool. This plug-in camera features full pan and tilt capabilities, allowing you to remotely control its view and cover an entire room.
HD video ensures clear visuals, while two-way audio lets you communicate with family members or pets. It integrates seamlessly with Alexa, offering voice-controlled convenience.
Who’s It For?
This camera is perfect for tech-savvy users or families who need flexible indoor coverage. Its rotating lens is especially useful for monitoring kids, pets, or high-traffic areas like living rooms or kitchens. Plug-and-play functionality makes it an excellent choice for those new to home security systems.
Blink Outdoor 4 Floodlight Camera
Key Features
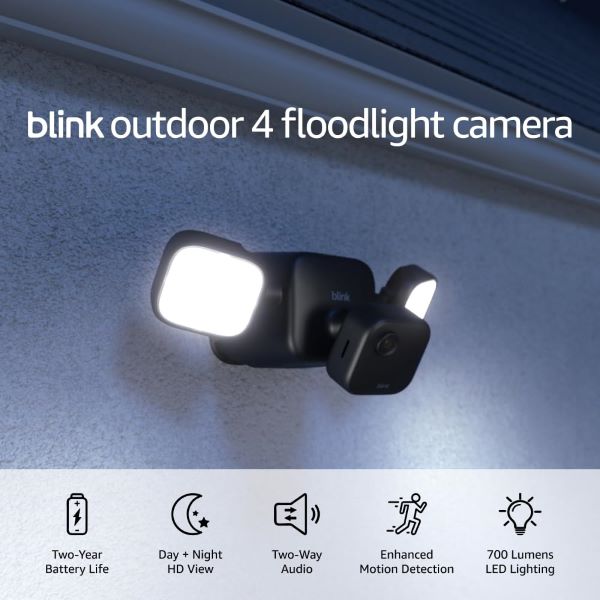
The Blink Outdoor 4 Floodlight Camera combines a wire-free security solution with a powerful 700-lumen floodlight. With its two-year battery life, it offers low-maintenance operation while providing enhanced motion detection and HD live views.
The floodlight feature illuminates large outdoor spaces, making it ideal for dark driveways or backyards. Like all Blink devices, it integrates with Alexa for seamless smart home control.
Who’s It For?
This product is tailored for homeowners prioritizing security in poorly lit areas. The combination of motion-activated lighting and HD camera functionality is excellent for deterring potential intruders while keeping critical outdoor spaces well-monitored.
Conclusion
Blink’s lineup of security cameras offers something for every need, from the versatile Outdoor 4 system for wide-area monitoring to the flexible Mini Pan-Tilt Camera for indoor coverage, and the feature-packed Floodlight Camera for added safety in low-light conditions. Together, these cameras make up a comprehensive, reliable, and user-friendly solution to modern home security challenges. Whether you’re starting from scratch or upgrading your current setup, Blink’s innovative products are designed to give you peace of mind.
Blink Outdoor 4 Setup Guide
The Blink Outdoor 4 camera offers a straightforward setup process that ensures you can start monitoring your home quickly and efficiently. Whether you’re a new Blink user or adding to an existing system, this guide will walk you through the essential steps to get your Outdoor 4 camera up and running.
Key Features of the Blink Outdoor 4
Before diving into the setup, here’s a quick overview of the enhanced features that make the Outdoor 4 a standout choice for home security:
- 1080p HD Video: Clear visuals for live views and recordings.
- Two-Way Audio: Communicate directly through the Blink app.
- Improved Low-Light Vision: Enhanced performance for nighttime monitoring.
- Wider Viewing Angle: Expanded 143° field of view.
- Dual-Zone Motion Detection: Faster and more accurate motion alerts.
- Person Detection: Minimize false alerts with a Blink Subscription Plan.
- Extended Range: Enhanced range when paired with the Sync Module XR.
Step-by-Step Setup Guide
Step 1: Download the Blink App
Start by downloading the Blink app on your smartphone or tablet. Create an account if you’re a new user.
Step 2: Set Up the Sync Module
A Sync Module is required to connect your Outdoor 4 camera to the Blink system. If you haven’t set it up yet, refer to the guides for either:
- Sync Module 2
- Sync Module XR
Follow the prompts in the Blink app to connect your Sync Module to your Wi-Fi network.
Step 3: Add the Outdoor 4 Camera
- From the Blink app’s Home Screen, tap the + icon in the upper right corner.
- Select Wireless Cameras from the Add Device screen.
- Scan the QR code located inside the back cover of the Outdoor 4 camera, or tap Enter Serial Manually. Learn how to remove the back cover if needed.
- Once the camera’s serial number is recognized, select the system you want to add it to and tap Continue.
Step 4: Configure for Extended Range (if applicable)
- If paired with the Sync Module XR, you’ll see an Extended Range message under the system name.
- On the Network Selection Screen, choose the desired network: Wi-Fi, Extended Range (XR), or Extended Range Plus (XR+). Then tap Save.
Step 5: Finalize the Setup
- Once the camera is successfully added, you’ll see a confirmation message. Tap Done.
- The Outdoor 4 camera will now appear on the Home Screen.
- Rename the camera by tapping its serial number.
Step 6: Mount Your Camera
Your Outdoor 4 camera can be mounted on various horizontal or vertical surfaces. Use the mounting guide in the Blink app for tips and instructions to secure the camera in the optimal location.
With the Blink Outdoor 4’s enhanced features and seamless integration, you can enjoy reliable and comprehensive home security right from the start. If you encounter any issues during setup, the Blink app provides helpful troubleshooting tips to ensure a smooth experience.


![Outdoor 4 [Newest Model] - Wireless outdoor/indoor home security camera(s) with 2-year battery life, dual-zone motion detection - 3 camera system](https://buzz-products.com/wp-content/uploads/2024/11/Blink-Outdoor-4-Newest-Model-Wireless-outdoor-indoor-home-security-camera-with-2-year-battery-life-dual-zone-motion-detection-3-camera-system.jpg)


